How To Turn A Loudspeaker Into A Microphone In 2 Easy Steps

So you've likely heard that microphones and speakers are practically the same things, only in reverse, but is it possible to turn a speaker into a microphone? The answer is yes!
How to turn a loudspeaker into a microphone in 2 easy steps:
- Expose the wires at the female end of your audio cable (if using XLR) or at either end (if using TRS, TS, RCA, etc.).
- Connect the positive wire to the negative terminal of the speaker and the negative wire (or ground/shield wire if using an unbalanced cable) to the positive terminal of the speaker.
With these two simple steps, you can turn a speaker into a microphone. That being said, there are more specifics you should know before experimenting with turning your loudspeakers into microphones. This article will clear up any issues you may have about turning a speaking into a mic.
If you'd like to support my work and learn more about music production, please consider subscribing to my Substack.
Suggested/Required Tools For The Job
To effectively turn a loudspeaker into a microphone, I recommend using the following tools:
- Screwdriver: to easily remove the loudspeaker from the speaker cabinet.
Recommended screwdriver: Klein Tools 32500. - Wire cutter/stripper: to cut the lead wires and expose the conductive strands within.
Recommended wire cutter/stripper: DOWELL 10-22 AWG Wire Stripper. - Alligator clips: to hold wires in place in order to test connections.
Recommended alligator clips: Windcloud alligator clips. - Solder: to electrically connect the wires to the proper terminals.
Recommended solder: WYCTIN 60-40. - Soldering iron: to melt and remove the original solder and to melt new solder into place.
Recommended soldering iron: Weller D650PK. - Desoldering pump: to remove melted solder cleanly and effectively.
Recommended desoldering pump: EDSYN SOLDAPULLT .
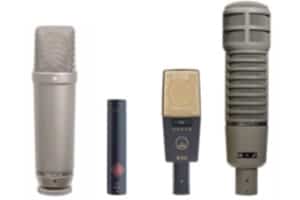
The Similarities Of A Microphone And Loudspeaker
Before we get into the how-to portion of this article, let's quickly discuss how the microphone and loudspeaker are basically the same design, only reversed.
A moving-coil dynamic microphone transducer works on the principle of electromagnetic induction, just like the vast majority of loudspeakers and headphones.
Magnetic Induction In The Dynamic Microphone
The moving-coil dynamic microphone has a diaphragm that moves according to the varying sound pressure around it. Attached to this diaphragm is a conduction coil that is surrounded by permanent magnets.
As the coil moves, it experiences a changing magnetic flux. Therefore, electromagnetic induction takes place, and an electrical voltage is produced across the coil. Leads are taken from each end of the coil to carry out this electrical AC voltage, better known as the mic signal.
Magnetic Induction In The Loudspeaker
The loudspeaker has a conductive voice coil attached to a diaphragm. This conductive coil sits within a permanent magnetic structure.
An electrical AC Voltage (an audio signal) is applied across the coil. Electromagnetic induction occurs, causing the coil to move within the magnetic field according to the voltage applied to it.
The diaphragm moves along with the attached coil, pushing air as it does so. This pushing and pulling causes varying sound pressure, which is better known as sound waves!
A Loudspeaker Is Simply A Microphone In Reverse
So we can see that a typical voice coil speaker is basically the same as a moving-coil dynamic microphone.
Of course, the microphone is relatively small in size and signal. However, the mechanics of the mic and speaker are the same. This allows us to easily turn a speaker into a microphone (and vice versa). Let's look at how!
To learn more about microphone and loudspeaker transducers, check out the following My New Microphone articles:
• How Do Microphones Work? (The Ultimate Illustrated Guide)
• How Do Speakers & Headphones Work As Transducers?
How To Turn A Loudspeaker Into A Microphone
Again, turning a loudspeaker into a microphone is as simple as connecting the wires of a mic cable to the proper terminals of the speaker's voice coil. However, “as simple” gets complicated quickly, party due to the following factors:
- Different speaker designs: properly taking apart the speaker to expose the voice coil and then properly removing the speaker wires from the voice coil.
- Various mic cable designs: depending on the audio cable, we may have 3 wires or 2 wires and may have a female and male end (it's essential that we connect the female end to the speaker).
Although there are really only two critical steps involved in turning a loudspeaker into a microphone, it's not necessarily that easy. There is often some preparation required in getting the loudspeaker and mic cable ready for connection.
And so, in this How-To, we'll discuss the process of turning a speaker into a mic in great detail.
In these detailed steps, we'll cover the following:
- How to choose and prepare your speaker
- How to choose and prepare your mic cable
- How to connect the speaker to the mic cable
- How to use your newly transformed speaker as a microphone
How To Choose And Prepare Your Speaker
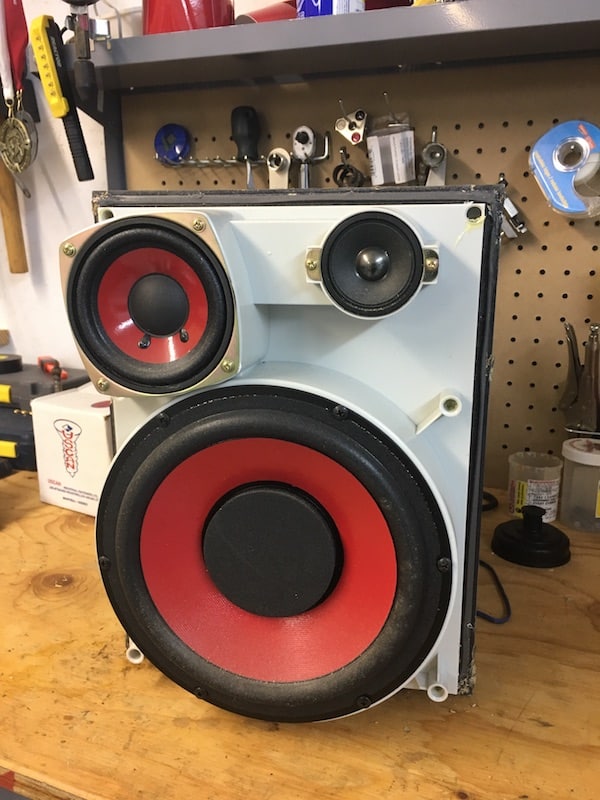
Although any voice-coil speaker (which means nearly all of them) is a great candidate for getting turned into a microphone, it's better to choose a speaker you don't use anymore or a cheap speaker that is easily replaceable.
Realistically, no speaker-turned microphone will perform as well as a microphone designed to be a microphone. Speaker mics make for great low-end pickups but are not overly sensitive or accurate.
Though nothing is stopping you from turning your HiFi monitors into microphones, I'd highly suggest using the $10 secondhand speaker you bought at the pawnshop!
I found an old pair of JVC speakers, of which I used one for this experiment.
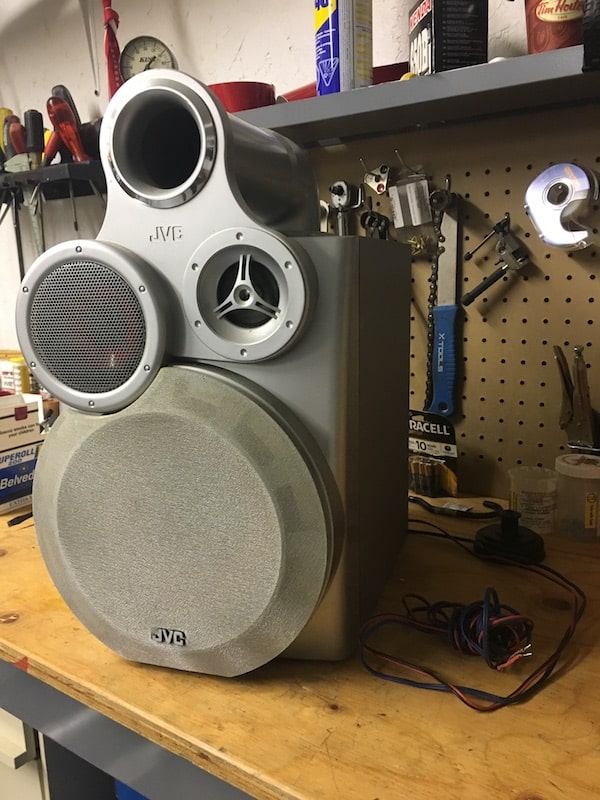
To prepare your loudspeaker, you must remove the speaker wires that connect to the voice coil.
Most speaker transducers are protected within some sort of box or casing. The majority of speaker voice coils can be accessed by unscrewing a panel or two from the protective box/casing.
Once you have access to the speaker voice coil, remove the speaker wires that connect to the positive and negative terminals.


There are three main ways these wires are connected:
- Soldering.
- Loose ends wrapped.
- Loose ends clamped.
With soldered connections, you could cleanly “unsolder” the wires from the voice coil by applying heat to the solder, removing the wires, and cleaning up the excess solder. Alternatively, you could do a rougher job and pull the wires from their connection, leaving some solder behind.
The loose (frayed) ends are easier cleaner to remove. For the wrapped ends wound around the terminals, unwind them. With the clamped ends, undo the clamp and remove.
Okay, now that you've got your speaker (soon to be mic) prepared, it's time to prepare the mic cable.
How To Choose And Prepare Your Mic Cable
There are many types of audio cables on the market today. So, which cable works best with a speaker-turned-microphone?
My recommendation is the 3-pin XLR, even if you only end up using 2 pins for an unbalanced signal. This is partly due to the fact that most studio microphones use XLR and, therefore, most min inputs accept XLR.
That being said, any audio cable will do, and it's your choice as to which one you will use. In this section, we'll talk about preparing the following cables for your speaker-turned-microphone:
- XLR (3-pin) – balanced
- TRS (1/4″) – balanced
- TS (1/4″) – unbalanced
- RCA – unbalanced
Let's quickly differentiate balanced audio cables from unbalanced cables:
A balanced audio cable has at least three wires. It carries the audio signal on two audio wires and has a third wire to act as the ground and shield. One audio wire carries the positive polarity signal while the other carries an equal but opposite polarity signal. The ground/shield wire, as the name suggests, acts as the cable shield and ground wire.
A balanced input receives a balanced signal and differentially amplifies the opposite polarity signal wires. This results in a strong signal with excellent noise rejection.
An unbalanced audio cable has two wires: one signal wire and one ground/shield wire. Because an audio signal requires a complete circuit to flow, the ground/shield wire also acts as a signal return, carrying part of the audio signal as well.
An unbalanced input receives the signal from the unbalanced cable's signal wire and ground/shield wire. Unbalanced signals are not as strong as their balanced counterparts and have less noise rejection.
Related article: Do Microphones Output Balanced Or Unbalanced Audio?
Another important aspect of choosing your cable is the length of the cable. How will your new speaker-mic be designed?
If you plan on having a set output connection in some sort of body (like most professional mics), then a shorter cable will do. In fact, single individual wires may work even better than a cable!
However, if you want a bare-bones speaker-mic that can be positioned away from a preamp or recorder, you'll need a longer cable. When sending your speaker-mic signal any significant distance (25 feet or more), I would highly recommend using a balanced cable like an XLR (or a TRS).
With those notes out of the way, let's talk about preparing each of the aforementioned cables types. They are, once again:
- XLR (3-pin) – balanced
- TRS (1/4″) – balanced
- TS (1/4″) – unbalanced
- RCA – unbalanced
Note that by “preparing,” I mean altering a regular cable with proper connections on either end. It is totally possible to do this with bulk cable, but if you're using bulk cable and making your own connections, you probably already have the skills and knowledge to connect these cables to the speaker.
Preparing An XLR Cable
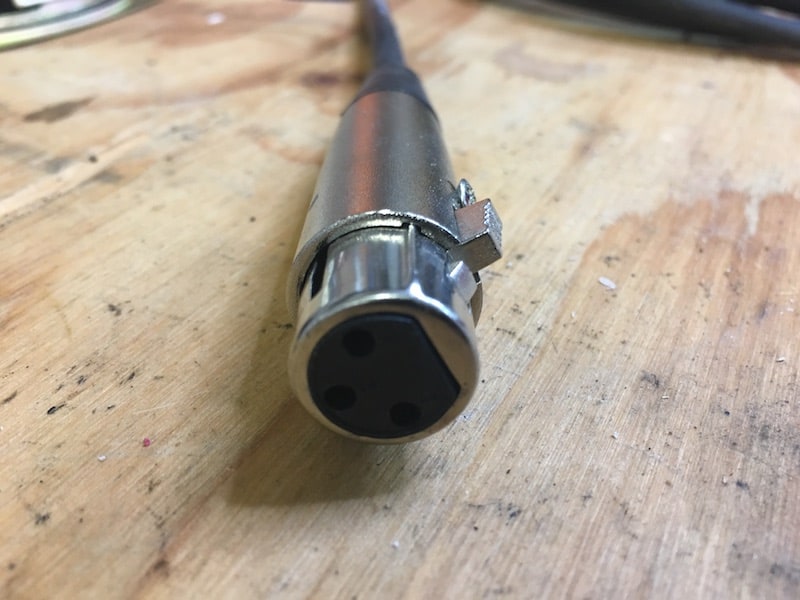
To prepare an XLR cable, we must remove the female connector from the cable and expose the wires there. The male connector is left intact.
XLRs cables are designed to take in audio at the female end and output audio at the male end. Mic inputs (which are of XLR-type) are, therefore, female.
The male end of the XLR cable will be the output connection of the speaker-mic. If you look at any microphone with an XLR output, it will be male as well.
Before removing the female connector, check which wires lead to which pin of the XLR. A 3-pin XLR connector has each of its pins marked by the numbers 1, 2, and 3. By removing the cap without undoing the connector, we can see which wire goes to which pin.
This is important since there is no standard colour code for XLR wires. That being said, red is most often positive, ground/shield is most often uncoloured or white, and negative is blue, black, or another colour.
What is standard (or at least close to being standard) is the pins of the 3-pin XLR connector:
- Pin 1 = ground/shield.
- Pin 2 = positive (hot).
- Pin 3 = negative (cold).
Once you've identified which wire coincides with each pin, it's time to remove the female connector.
The cleanest way of doing this is by melting the solder off. Of course, a faster, rougher way would be to pull it off by force.
Once the connector is removed, ensure there's enough exposed conductive wire to properly connect to the speaker (there usually is).
And there you go, you've prepared your XLR cable!
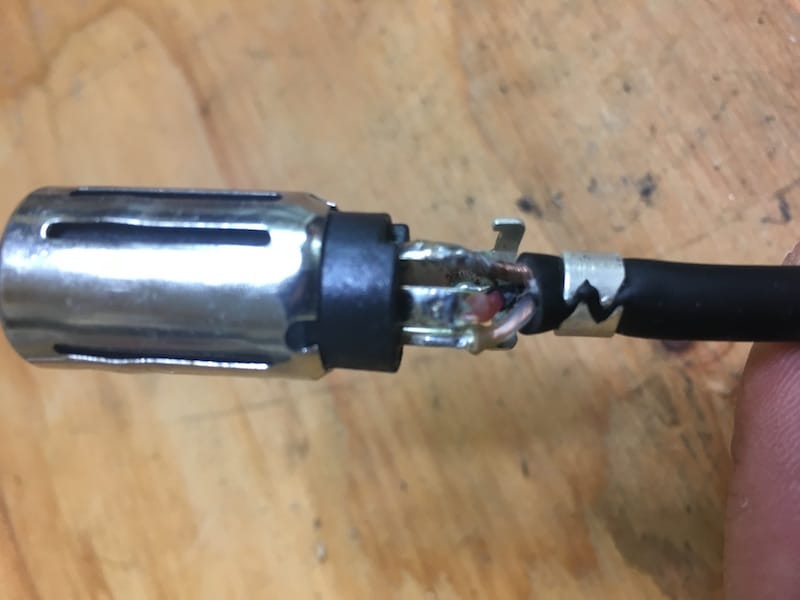
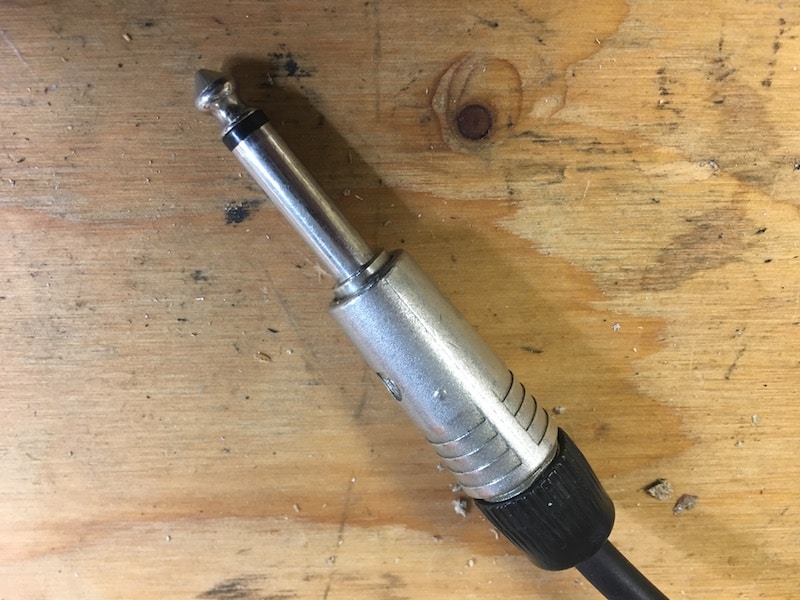
Preparing A TRS Cable
Unlike XLRs, TRS cables are the same at either end, so it doesn't matter which end connector we remove to connect the TRS cable to the speaker.

Before removing the full connector, see if you can identify the wires that coincide with the tip (positive), ring (negative), and sleeve (ground/shield) or the TRS cable. Like the XLR, there is no standardized colour code for these wires, so it's up to us to identify which is which.
Once we've identified which wire is which, we can remove the connector. Once again, the cleanest way to do this is to melt the soldering off.
Then we ensure there's enough exposed wire to effectively connect to our speaker terminals (there typically is), and there we go, our TRS cable is prepared!
For more info on male/female connectors and the differences between jack and plugs, check out my article What Is The Difference Between A Microphone Plug And Jack?
Preparing A TS Cable
Prepared a TS cable is just like preparing a TRS cable, except easier.
Remove one end's connector as cleanly as possible. The tip (hot) will be the wire coming from the centre of the cable. The sleeve (ground/shield) will be the wire the extends from around the tip.
Ensure there's enough exposed wire to connect to the speaker, and you're good to go!
Preparing An RCA Cable
Preparing the RCA is nearly the same as preparing a TS cable.
Remove one end's connector cleanly and ensure there's enough exposed wire to connect to the speaker. The signal wire goes through the centre of the RCA cable while the ground/shield comes from the perimeter of the inner cable.
Using The Speaker's Built-In Output Wires
Oftentimes we can use the built-in wires that are already connected to the speaker's terminals.
In this case, we would need a male XLR connector (or any of the other connectors mentioned), though I highly recommend XLR.
Solder the ends that are not connected to the speaker to the connector.
Using XLR, solder the wire from the speaker's positive terminal to pin 3 (negative) and solder the wire from the negative terminal of the speaker to pin 2 (positive). The reason we go + to – and vice versa has to do with the natural polarity of the speaker versus the usual polarity of a mic, which we'll get to in a second.
Additionally, I'd suggest connecting pin 1 of the XLR (or the sleeve of a TRS) to the body of the speaker as a ground.
Speaking of actually connecting the speaker-mic to a microphone output, let's dive into the how-to of connecting the above cable types to the speaker.
How To Connect The Speaker To The Mic Cable
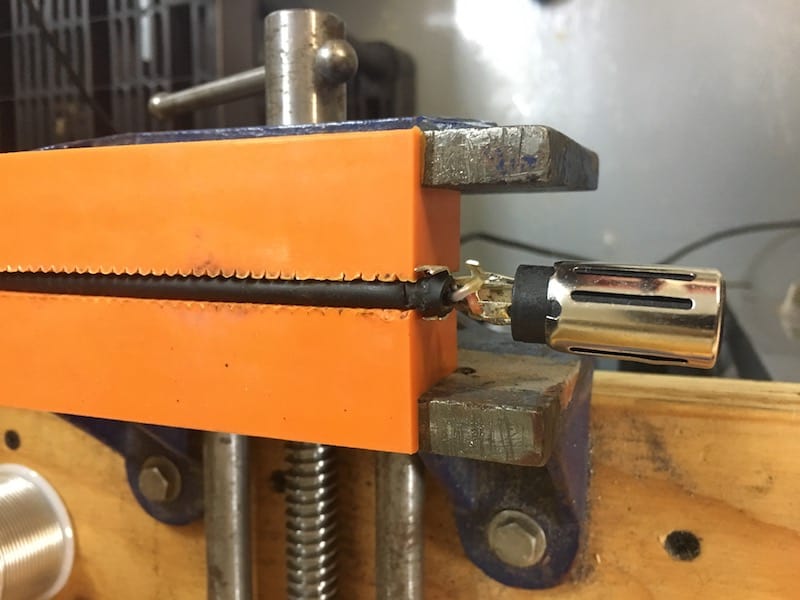
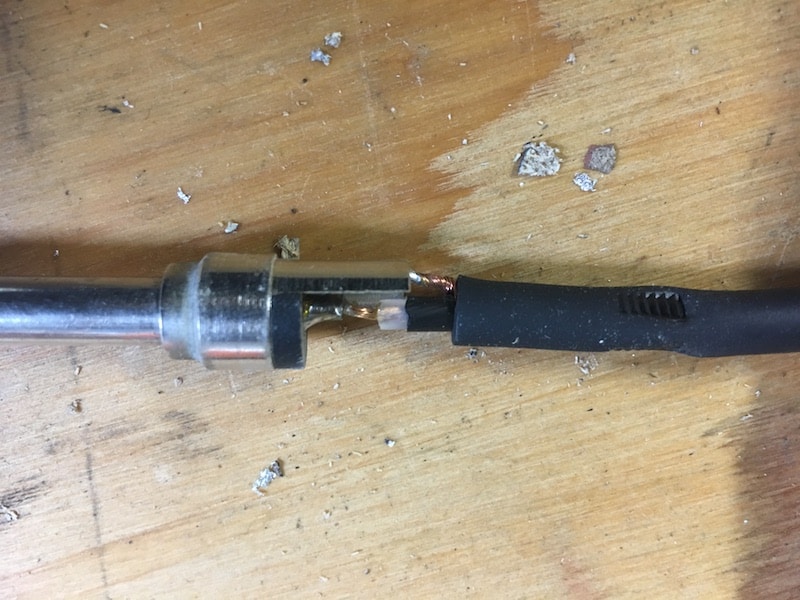
Physically connecting the mic cable to the speaker is as simple as touching the proper cable wires to the proper terminals (and this is a method of quickly testing the mic).
However, we would typically want to solder the cable wires to their appropriate speaker terminals to improve the connection and increase the longevity of that connection.
As mentioned earlier, some speakers have their terminals connect to wires via winding the wire around the terminal or clamping the wire. However, these are less common and often not as good as a properly soldered connection.
It was mentioned in the quick answer at the beginning of this article that the positive wire of the cable should be connected to the negative terminal of the speaker while the negative (or ground/shield) should be connected to the speaker's positive terminal.


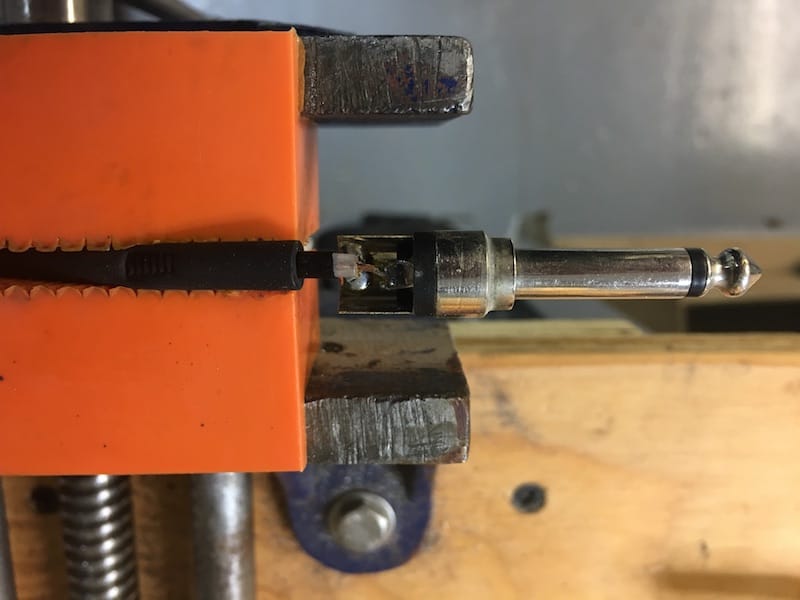
The small driver with connected TS (right)
It really doesn't matter if positive goes to negative and negative, positive when it comes to functionality. The speaker-mic will still work just fine.
The reason why I suggest switching the positive and negative connections is for phase coherence.
Typically, the inward motion of a mic diaphragm results in a positive polarity signal, while outward motion results in a negative polarity signal.
The speaker is wired oppositely, with the positive polarity signal pushing the speaker diaphragm outward and the negative polarity signal drawing the speaker diaphragm inward.
Again, this will not affect whether or not the speaker-mic will work or not. It is simply worth commenting on the polarities of mics versus speakers.
Balanced XLR And TRS
How to connect an XLR cable to a speaker-turned-microphone:
If using an XLR cable, connecting the female end to the speaker-mic is important, leaving the male end to connect to an audio device input (such as a mic preamp).
- Connect pin 2 (hot) to the positive voice coil terminal.
- Connect pin 3 (cold) to the negative voice coil terminal.
- Connect pin 1 (ground) to the body of the speaker, to the positive terminal, or leave it disconnected. Tape it off if leaving pin 1 disconnected.
How to connect a TRS cable to a speaker-turned-microphone:
- Connect tip (hot) to the positive voice coil terminal.
- Connect ring (cold) to the negative voice coil terminal.
- Connect sleeve (ground) to the body of the speaker, to the positive terminal, or leave it disconnected. Tape it off if leaving pin 1 disconnected.
Unbalanced TS And RCA
How to connect a TS cable to a speaker-turned-microphone:
- Connect tip (hot) to the positive voice coil terminal.
- Connect sleeve (ground/shield) to the negative voice coil terminal.
How to connect an RCA cable to a speaker-turned-microphone:
- Connect centre pin (hot) to the positive voice coil terminal.
- Connect outer pin (ground/shield) to the negative voice coil terminal.
How To Use Your Newly Transformed Speaker As A Microphone
So now that you've created a speaker-mic, it's time to use it!
At first listen, you'll find that the speaker-mic does not sound as good as a regular mic. This is simply due to the fact that speakers were designed to be speakers and move large amounts of air, while microphones were designed to pick up sound waves accurately.
- A large sub-woofer speaker-mic would sound very muffled.
- A regular loudspeaker would sound decently intelligible, but with little low-end.
- A tweeter speaker would sound very tiny relative to the other speaker-mic and certainly compared to any professional microphone.
So, sure you could record anything with these mics, but their limitations corner them into fairly niche applications.
The most common application for speaker-mics is capturing low-end frequencies on kick drums and bass guitar cabinets. These large diaphragm mics may very well capture greater and more present low-end than their professional microphone counterparts.
Additionally, the tweeter speaker-mic could be used to record a certain tinny effect in your productions.
But above all, it's pretty cool to show off your invention, regardless of how dull it may sound!

Professional Speaker-Mic Manufacturers
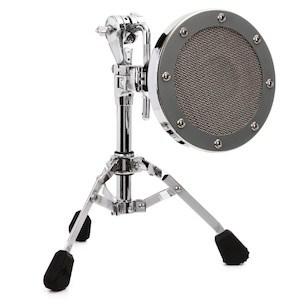
Perhaps the most famous speaker-mic to ever hit the mark was the Yamaha Subkick (now discontinued).

Solomon Mics is another manufacturer worth mentioning. The LoFreq (pictured) is a popular speaker-mic choice for kick drums and bass guitar cabinets.
Solomon Design
Solomon Design is featured in My New Microphone's Top 11 Best Microphone Brands You’ve Likely Never Heard Of.
Drum Workshop also has a product called The Moon Mic, an example of a moving-coil dynamic microphone that uses a loud-speaker-sized diaphragm.
Alternative Speaker Designs
Like microphones, loudspeakers transducers come in different designs. Unlike mics, however, these other loudspeaker designs are not nearly as popular.
The alternative speaker designs as analogous to the other common microphone designs.
- Like condenser microphones, we have electrostatic speakers.
- Like ribbon microphones, we have ribbon speakers.
Related Questions
How do you use a microphone with an audio (phone) jack? The majority of microphones have XLR outputs. The most common way to use a microphone with an audio phone jack (whether TS or TRS) is through the use of an adapter. There are plenty of adapters on the market designed to change your mic's output connector into the audio jack connector you need.
How can I use headphones as a mic and speaker? Headphones naturally work the same as speakers. Just like you can turn a speaker into a microphone, you can turn a headphone into a microphone. Some headphones come with built-in mics (often referred to as headsets), which allow for the simultaneous use and connection of headphones and a microphone.
Choosing the right microphone(s) for your applications and budget can be a challenging task. For this reason, I've created My New Microphone's Comprehensive Microphone Buyer's Guide. Check it out for help in determining your next microphone purchase.
Choosing the right PA speakers for your applications and budget can be a challenging task. For this reason, I've created My New Microphone's Comprehensive PA Speaker Buyer's Guide. Check it out for help in determining your next PA speaker purchase.
With so many loudspeakers on the market, purchasing the best speaker(s) for your applications can be rather daunting. For this reason, I've created My New Microphone's Comprehensive Loudspeaker Buyer's Guide. Check it out for help in determining your next speaker acquisition.
Leave A Comment!
Have any thoughts, questions or concerns? I invite you to add them to the comment section at the bottom of the page! I'd love to hear your insights and inquiries and will do my best to add to the conversation. Thanks!
This article has been approved in accordance with the My New Microphone Editorial Policy.