The Complete Guide To Ribbon Microphones (With Mic Examples)

Ribbon microphones are among the least understood yet most cherished microphones in the world. These peculiar mics may not be as popular as dynamic and condenser microphones, but they are valued just as much (perhaps even more) by musicians, audio engineers, and audiophiles alike.
What is a ribbon microphone? A ribbon microphone has a thin, often corrugated, electrically conductive ribbon-like diaphragm and acts as a transducer, converting sound waves into audio signals. Ribbon mics work on the principle of electromagnetic induction, making them “dynamic” just like their moving-coil counterparts.
In this complete guide to ribbon dynamic microphones, we'll discuss them in great detail, going through their functionality, characteristics and even looking at some example microphones. This article's purpose is to answer all your questions about ribbon mics so that you're better equipped with the knowledge to succeed in your ribbon mic endeavours.
If you'd like to support my work and learn more about music production, please consider subscribing to my Substack.
Table Of Contents
- What Is A Ribbon Microphone?
- A Bit Of History On Ribbon Microphones
- How Do Ribbon Microphones Work?
- Electromagnetic Induction
- Active And Passive Ribbon Microphones
- General Characteristics Of A Ribbon Microphone
- Safety Tips For Ribbon Microphones
- Applications Of Ribbon Microphones
- Ribbon Microphone Examples
- Differences Between Ribbon And Dynamic Microphones
- Differences Between Ribbon And Condenser Microphones
- Related Questions
What Is A Ribbon Microphone?
The most simple definition of a ribbon microphone is as follows:
A microphone transducer that converts sound to audio with a thin, electrically conductive ribbon-like diaphragm suspended within a magnetic structure. As the diaphragm moves back and forth within the permanent magnetic field, a mic signal is electromagnetically induced across it.
Ribbon microphones, like their moving-coil dynamic counterparts, transduce energy on the principle of electromagnetic induction. For this reason, ribbon mics may very well be called “ribbon dynamic mics.” However, moving-coil microphones are more often referred to simply as dynamic mics, while ribbon mics are known simply as ribbon mics.
To learn more about moving-coil mics, check out my article The Complete Guide To Moving-Coil Dynamic Microphones.
The ribbon diaphragm is often made of thin corrugated aluminum. This conductive material remains strong in this thin, folded, ribbon-like shape, which is essential for proper diaphragm movement and longevity. The corrugation adds strength and flexibility to the diaphragm since it allows the ribbon to be suspended loosely within the magnetic structure.
Here are some key points that make aluminum a great ribbon material:
- Aluminum is conductive (3.77×10⁷ Siemens per meter), but less so than copper (5.96×10⁷ Siemens per meter).
- Aluminum is very light (2.7 g/cm3) and allows the diaphragm to be reactive even at lower tensions.
To learn more about diaphragm materials, check out My New Microphone's article What Are Microphone Diaphragms Made Of? (All Diaphragm Types).
The ribbon is suspended within a magnetic structure. As sound waves cause the diaphragm to move, an AC voltage is induced across the ribbon via electromagnetic induction. This voltage is effectively the mic signal.
This explains the basic working principle and defining factor of ribbon microphones. Of course, there’s more to ribbon microphones than this, and so we'll discuss each of the design components and the principle of electromagnetic induction in more detail within this article.
A Bit Of History On Ribbon Microphones
In 1924, German scientists Walter Hans Schottky and Dr. Erwin Gerlach co-invented the first-ever ribbon microphone.
This original ribbon microphone was designed with the idea that a conductive diaphragm moving within a magnetic field would create an audio signal. A thin conductive ribbon could be suspended within a magnetic structure and produce an electric signal as it moved according to the sound waves around it.
In the 1930s, magnets became available that were strong enough to make the ribbon microphone invention practical for audio production.
With the magnets to make it possible, Harry F. Olson of RCA became a major player in the development of ribbon microphone technology.
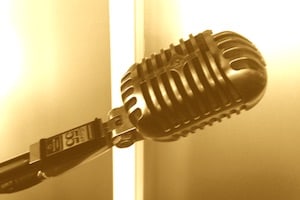
In fact, Harry F. Olson designed the RCA PB-31: the first-ever commercially available ribbon microphone. The PB-31 was released in 1931 with a limited run of about 50 units and is a significant milestone in microphone advancement.

At the time, ribbon microphones outperformed condenser mics in frequency response, clarity, and realism.
The PB-31 was replaced in early 1932 by the improved RCA 44-A (the predecessor of the famed 44-BX), which has inspired numerous other ribbon microphone designs since then.
To learn more about microphone history and the inventors of each mic type, check out my article Mic History: Who Invented Each Type Of Microphone And When?
How Do Ribbon Microphones Work?
So far, we've discussed the basics of how ribbon microphones work: A ribbon-shaped diaphragm moves with incoming sound waves within a magnetic structure to produce a mic signal.
Let's now get into the nitty-gritty of how ribbon microphones work.
To best understand the functioning of a ribbon microphone, let's start by learning about the ribbon element/baffle.
The Ribbon Transducer Element/Baffle
The ribbon transducer element (also known as the ribbon baffle) refers to the entire transducer element of the ribbon microphone. The baffle is the key component responsible for converting sound (mechanical wave energy) into audio (electrical energy).
Let's have a look at a famous ribbon microphone's transducer element. The ribbon baffle of the Royer R-121 ribbon microphone is pictured below:

To further our understanding of ribbon elements, let's simplify the picture above with a labelled diagram:

So the basic ribbon baffle is made up of a physical housing and the following 4 components:
Let’s discuss each of these individual components in more detail:
Conductive Ribbon Diaphragm
The conductive ribbon diaphragm is where the ribbon microphone gets its name. That's how critical this component is to the microphone.
As mentioned earlier, the diaphragm is a movable ribbon-like piece that reacts to incoming sound waves. These diaphragms must be electrically conductive and are typically made of aluminum (though other materials are possible as well).
Aluminum is a great choice for its conductivity, strength when shaped and corrugated like a ribbon, light weight, and reactivity to varying sound pressure levels.
Sound waves cause increases and decreases in ambient pressure. The diaphragm is generally exposed on both sides. The difference in pressure between the sides causes the diaphragm to move inward and outward from its resting position.
Ribbon microphone diaphragms are often very thin in order to react accurately to incoming sound waves. This allows for greater accuracy and movement at the expense of fragility and lower conductivity.
The diaphragms are also typically corrugated, which helps improve their strength and allows for looser tensioning without sagging. This low tension drops the resonant frequency of the typical ribbon mic below the audible range, enhancing frequency response in the process.
For much more information on microphone diaphragms, check out my article What Is A Microphone Diaphragm? (An In-Depth Guide).
Magnetic Structure (Magnet + Pole Pieces)
In the simplified diagram below, we see that the magnetic structure of a ribbon microphone is quite unusual:

As we can see, we have two horseshoe-like magnets at either end of the diaphragm's length. Their poles line up so that the north pole is on one side of the ribbon and the south pole is on the other.
Ribbon microphone manufacturers utilize magnetic pole pieces to create a fully encompassing magnetic structure with the proper polarity and ideal magnetic field. These pole pieces effectively extend the poles of the main magnets. One pole piece connects the two north poles of the magnets, and another pole piece connects the two south poles of the magnets.
The main magnets need to be strong for their small size and are typically made of ferrite or powerful neodymium.
The pole pieces need to properly “extend” the magnetic poles of the magnet and need high magnetic permeability. Soft iron is often used. Better materials include alloys such as Permendur or Hyperco 90.
By having opposite magnetic polarity on either side of the ribbon, we create the best possible magnetic flux lines for the greatest amount of electromagnetic induction in the ribbon.
The magnetic structure fits very closely to the ribbon itself, allowing only enough space for the diaphragm to move while not allowing sound waves to pass between the magnets and the ribbon. This design is precise indeed!
For more information on magnets and microphones, check out my article Do Microphones Need Magnetism To Work Properly?
Electrical Lead Wires
An electrical lead wire is connected at each end of the ribbon diaphragm. These wires effectively take the induced voltage across the diaphragm and make it part of a greater circuit that ultimately leads to the microphone output.
Housing
The components of a ribbon baffle are housed within a single unit. This unit is then designed into the overall microphone design.
How Does The Ribbon Element Work As A Transducer?
So now that we know about the general design of a ribbon baffle let's have a closer look into how these ribbon elements work.
We'll start with the microphone's namesake component: the diaphragm.
Sound waves cause local changes in ambient pressure. These changes increase and decrease the localized pressure at specific points in the medium (which is typically air).
As sound waves reach the ribbon microphone, they cause varying pressure at the front and back of the diaphragm. The difference in pressure between the diaphragm's front and rear causes it to move back and forth about its resting position.
Note that the general ribbon baffle design has both sides of the diaphragm equal exposed to sound pressure. This is the truest form of a pressure-gradient microphone, and ribbon mics are inherently bidirectional (they have a figure-8 polar pattern)—more on this in the general characteristics of a ribbon microphone.
The ribbon diaphragm is fixed at its ends and free to move between these two points. This is unlike dynamic and condenser mic diaphragms which are typically fixed around their circumferences.
As the ribbon moves according to the sound waves, a voltage is induced. This is due to electromagnetic induction, which states that as a conductive material (the ribbon) moves within a permanent magnetic field (supplied by the magnetic structure), a voltage will be created across that conductor.
Since the diaphragm moves back and forth, this voltage alternates, causing an alternating current. This AC voltage is ultimately the microphone signal and is “taken out” of the baffle via electrical lead wires.
This is the essential working principle of ribbon microphones!
To learn more about mic signals and the role of magnets in ribbon mics, check out my articles What Is A Microphone Audio Signal, Electrically Speaking? and Do Microphones Need Magnetism To Work Properly? respectively.
Ribbon Microphone Design Post-Baffle
The ribbon microphone design is not made up entirely of the baffle/element. Though all ribbon microphones have some type of ribbon baffle, their circuits after their transducers may vary significantly.
Ribbon transducers are inherently passive (they do not require power to function). The majority of ribbon microphones are also passive with very simple circuits. However, there are active ribbon microphones on the market with different circuit topologies. There are even tube ribbon microphones on the market.
So in this section, we'll have a general look at the following 3 circuit paths of various ribbon mic types.
- Passive ribbon microphones (typical)
- Active FET/solid-state ribbon microphones
- Active tube ribbon microphones
It's important to note that there can be variations from the following designs, but this section will give a good idea of the general ribbon designs (doing through each individual ribbon mic design would be too much)
Passive Ribbon Microphones
The majority of ribbon microphones are passive and simple. They are essentially designed with a ribbon baffle/element, an output transformer, an output connector (nearly always an XLR), and a physical body with a grille to house the components in a single microphone unit.
So with a passive ribbon mic, the lead wires from the ribbon complete a circuit with an output step-up transformer.
Output Transformer
The output transformer benefits the ribbon microphone in numerous ways:
- Protects the microphone from DC voltage like phantom power
- Increases or “steps-up” the voltage of the induced mic signal
- “Matches” the impedance of the induced mic signal voltage
- Aids in isolating the microphone from other electronic devices and RFI
A passive ribbon microphone design resembles the following simplified diagram:

Before discussing how the step-up transformer works, let’s have a look at a simple diagram:

The step-up transformer is made of 3 key components:
- P: primary winding
- S: secondary winding
- MC: magnetic core
The transformer, like the ribbon transducer, works on the principle of electromagnetic induction.
The electrical lead wires from the ribbon connect to the primary winding of the transformer. The primary winding is a coil of conductive wire (typically copper) wound around a magnetic core.
Through electromagnetic induction, the AC voltage in the primary coil causes a change in the magnetic field of the magnetic core. The amount of magnetic variation is determined by the strength of the mic signal and the number of turns the primary coil has around the magnetic core.
All things being equal, the winding with a greater number of turns will induce more voltage or a greater change in the magnetic field. Therefore, to step up the voltage, the secondary winding must have more turns than the primary.
So the primary coil, which passes the signal (voltage) of the ribbon transducer, causes a varying magnetic field in the magnetic core. This varying magnetic field then induces a larger signal across the secondary winding.
The result is that the transformers step up or increase the voltage and, therefore, the audio signal's strength.
In addition to boosting the signal strength, the transformer also increases the impedance of the AC voltage. Though lower microphone output impedances are generally considered better, the increase in impedance is typically not enough to worry about with a ribbon's output transformer.
Transformers only pass AC voltage since DC will not cause any variations in the core's magnetic field. Therefore, a transformer will effectively protect the ribbon from any DC voltage such as phantom power.
Ribbon microphone diaphragms are notoriously fragile. Phantom power and other DC voltages have the potential to stretch, snap, or otherwise damage the ribbon if misapplied. Therefore, passive ribbon mics are designed with transformers to help protect their diaphragms from DC voltage.
Finally, the transformer also helps isolate the microphones from other electronic devices and block RFI (radio frequency interference). This is because the primary and secondary do not physically touch one another.
To learn more about microphone transformers, check out my article What Are Microphone Transformers And What Is Their Role?
Active FET/Solid-State Ribbon Microphones
In early 2002, Royer Labs introduced a new concept to ribbon microphones. Their R-122 was the first-ever active phantom-powered ribbon microphone. Since then, active ribbon microphones have grown in popularity.
More on the Royer R-122 in the ribbon microphone examples section.

Royer
Royer is featured in My New Microphone's Top 11 Best Microphone Brands You Should Know And Use.
We'll discuss the differences between passive and active ribbon mics shortly in our section on active and passive ribbon microphones. For now, though, we'll run through the basic design of an active FET (solid-state) ribbon microphone.
Here is a simplified diagram showing the components of a solid-state phantom-powered ribbon mic:

As we can see above, the general ribbon microphone has a very similar start to its signal path: sound waves cause diaphragm movement in the ribbon transducer. The transducer outputs a signal which is then stepped up by a transformer.
However, the step-up transformers in active ribbon mics tend to have higher turns ratios. This steps up the voltage (strength) of the mic signal at the expense of increasing the signal impedance.
So with the transformer's secondary winding “outputting” a relatively high AC voltage signal with relatively high impedance, an impedance converter/amplifier is put in line to help with the signal processing.
For a detailed article on solid-state microphones, check out My New Microphone's What Is A Solid-State Microphone? (With Mic Examples).
FET Impedance Converter/Amplifier
As the name suggests, the impedance converter (IC) of an active microphone acts to convert the impedance of the signal to a manageable level. These IC are transistor-based (particularly field-effect transistors) and also act as pseudo-amplifiers capable of boosting the voltage of the audio signal.
The ICs are the active components in active FET ribbon microphones. Before we get into how they work, let's have a look at a simplified diagram:

These transistors have 3 terminals:
- G = gate
- S = source
- D = drain
A powering source (typically phantom power) supplies a voltage across the source and drain terminals. This causes an electrical current between these two terminals.
The mic signal (from the secondary winding of the transformer) completes a circuit with the gate and source terminals of the IC.
The relatively high-impedance signal at the gate and source effectively modulates the lower-impedance current flow between the source and drain terminals.
Another way to look at this is that the source-gate is the high-impedance input, and the source-drain is the converter-impedance output. The output often has a stronger signal as an added benefit.
This impedance converter effectively boosts the voltage and improves the nominal impedance of the ribbon mic signal. In this way, the IC improves the ribbon mic's compatibility with standard mic preamps, which may not have the proper gain or input impedance to get the most out of the inherently low-output passive ribbon mic.
To learn more about FET impedance converters, check out my article What Are FETs & What Is Their Role In Microphone Design?
DC Power Source
Unlike their passive counterparts, active FET ribbon mics will not be damaged by phantom power. In fact, they require phantom power to run their impedance converters effectively!
Transformerless Output
You may have noticed that there's no transformer at the output of the above diagram. Many solid-state microphones are designed with transformerless output circuits rather than with transformers. Transformers are unnecessary in this case, and transformerless circuits tend to sound cleaner and are cheaper to manufacture.
Active Tube Ribbon Microphones
Royer Labs also developed the first tube ribbon microphone, known as the Royer R-122V.
More on the Royer R-122V in the ribbon microphone examples section.
As per usual, we'll start with a simplified diagram to represent the signal flow and components of a tube ribbon microphone:

To learn everything you need to know about tube microphones, check out my article What Is A Tube Microphone And How Do Tube Mics Work?
The Transformers
Perhaps the first thing we notice in the above graph is the inclusion of two transformers. In a vacuum tube ribbon mic, we can expect to see both a step-up and a step-down transformer.
The step-up transformer boosts the voltage of the mic signal before it reaches the tube.
The step-down transformer acts to balance the signal and fix the impedance before the output connector of the microphone. It also acts to protect the microphone from DC voltages like phantom power (tube mics are powered via external power supplies rather than via phantom power).
The Vacuum Tube
Vacuum tubes work similarly to the aforementioned transistors. They are impedance converters and pseudo-amplifiers. Let's have a look at a simple diagram of a triode vacuum tube and its 3 electrodes to better understand how they benefit ribbon microphone design:

- H = heater
- K = cathode (negatively charged)
- A = anode (positively charged)
- G = grid
An external power supply unit effectively heats the heater of the vacuum tube. This heat causes the negative cathode to begin emitting electrons in the sealed vacuum tube.
Note that the tube must hold a vacuum, or else the air (primarily oxygen) would burn up the elements.
These electrons are negatively charged, so they are repelled by the cathode and attracted to the anode. This means that as the tube is heated up, a steady stream of electrons flows from the cathode to the anode. If we think back to science class, a flow of electrons is an electrical current!
The mic signal is then used to control the grid of the vacuum tube. We can think of this as the “high-impedance input” of the tube.
The signal at the grid effectively opens and closes a grid within the tube that allows for more electron flow or less electron flow depending on the strength of the “input signal.”
In other words, the input signal at the grid modulates a second signal between the cathode and anode of the tube. This secondary signal can be thought of as the “output” of the tube and has a higher voltage and lower impedance than the original mic signal.
In this way, the tube acts as an impedance converter and amplifier of the mic signal.
The Power Supply Unit
As previously mentioned, tubes require external power to be properly heated. The main reason is that phantom power, the standard powering method, is not strong enough to heat the tubes properly.
Electromagnetic Induction
So we've discussed each type of ribbon microphone and how they work without really diving into the primary working principle.
To fully understand ribbon microphones, we have to comprehend electromagnetic induction!
So what is electromagnetic induction? Electromagnetic induction is the production of a voltage across an electrical conductor in a changing magnetic field.
This process was first discovered by Michael Faraday in 1831 and has since been utilized in many electrical components, including ribbon microphone transducer elements and microphone transformers.
There are 3 situations in which electromagnetic induction can take place:
- A stationary magnetic field and a moving conductor: this is the case with a ribbon microphone baffle/element
- A fixed conductor and a varying magnetic field: this is the case with a microphone transformer (both step-up and step-down transformers)
- Any situation where there is relative movement between a magnetic field and a conductor
The diaphragm (electrical conductor) moves through a permanent magnetic field supplied by a mic’s magnetic structure. The magnetic field relative to the ribbon is changing, and so once we close a circuit with the ribbon, we will have an electromagnetically induced current (and mic signal)!
To put it in other words, we can look at Micheal Faraday's Law of Induction:
Faraday’s Law of Induction states that the electromotive force (induced voltage) in a closed circuit is proportional to the rate of change over time of the magnetic flux through that circuit.
3 factors determine the amount of voltage induced across the ribbon of a via electromagnetic induction. They are:
- The conductivity of the ribbon: the greater the conductivity of the ribbon, the greater the potential for induced voltage.
- The velocity of the ribbon: by increasing the velocity of the ribbon diaphragm, we move through the magnetic field faster and therefore have a faster rate of change of the magnetic flux.
- The strength of the magnetic field: by increasing the strength of the magnetic field, we have a greater magnetic flux when field lines are perpendicular to a given area. The potential change in magnetic flux is therefore greater.
Note that the amount of coils in a conductor is another major factor in inducing a voltage. Moving-coil dynamic microphones have conductive coils and can produce mic signals in a magnetic field more easily. Ribbon diaphragms, on the other hand, have a more difficult time producing electrical signals.
Ribbon microphone diaphragms have a fixed conductivity, and their magnetic structures have a constant magnetic field. Therefore, it is the velocity of the ribbon diaphragm that determines the changing of the voltage across that moving coil.
Therefore, stronger and faster variations in sound pressure (i.e., transients) produce stronger mic signals.
Active And Passive Ribbon Microphones
So we've touched on the various ribbon microphone design types. Passive ribbon mics are still the most common, but active ribbon mics (both solid-state and tube) exist and are worth discussing in this complete guide.
Therefore, let's look at the similarities and differences between passive, solid-state, and tube ribbon microphones. The easiest way to present this information is in a table:
| Passive Ribbon Mics | Active Solid-State (FET) Ribbon Mics | Active Tube Ribbon Mics | |
|---|---|---|---|
| Transducer Principle | Electromagnetic Induction | Electromagnetic Induction | Electromagnetic Induction |
| Active/Passive | Passive | Active | Active |
| Frequency Response | Natural/Dark | Natural/Dark | Natural/Dark |
| Transient Response | Accurate | Accurate | Accurate |
| Polar Pattern | Bidirectional By Nature | Bidirectional By Nature | Bidirectional By Nature |
| Output Transformer | Yes | Sometimes | Yes |
| Impedance Converter | N/A | Transistor-Based (FET/JFET) | Vacuum Tube |
| Power Source | N/A | Phantom Power (Typical) | External Power Supply Unit |
| Sensitivity Ratings | Very Low | High | High |
| Output Impedance | Low But Very Frequency-Dependence | Low And Levelled | Low And Levelled |
| Self-Noise | N/A | Lower | Higher |
| Audio Quality | Accurate But Dependent On Preamp | Accurate And Relatively Cold | Accurate And Relatively Warm |
| Durability | Fragile Diaphragm | Fragile Diaphragm | Fragile Diaphragm And Tube Components |
| Price | Moderate-High | High | Highest |
This may seem obvious, but the biggest difference between passive and active ribbon mics (other than the fact the active need power and passives don't) is the quality of the output signal.
The Issue With Passive Ribbon Microphones
Passive microphones tend to output low-level (low voltage) signals with impedance levels that are very frequency-dependent.
The “standard” preamp often has difficulty with the signals from ribbon mics. There are 2 reasons for this:
- Gain: standard preamp often fail to provide enough gain to bring a ribbon mic signal up to line level. Those preamps that do provide enough gain are often at or near the maximum gain where the gain begins to distort the signal.
- Input impedance: the output (source) impedance of the passive ribbon mic often spikes somewhere in the lower frequency range. A standard preamp with a fixed nominal input (load) impedance may fail to accurately represent the frequencies in this range. Different “standard” preamps will actually change the character of the typical passive ribbon microphone (often in the low-end).
Therefore, a high-impedance, high-gain ribbon-specific preamp is often the solution to really bringing out the charm and character of a passive ribbon microphone.
AEA is a world-class ribbon microphone manufacturer and has its own line of optimized ribbon-specific preamplifiers. The AEA TRP2 is one example of a ribbon mic preamp:

AEA
AEA is featured in My New Microphone's Top 13 Best Microphone Preamplifier Brands In The World.
The TRP2 boasts an amazing 85dB of quiet JFET gain, switchable phantom power, polarity flip, high-pass filter and a 63 kΩ high-impedance input. All of these specs help tremendously in bringing out the transient and frequency response and the true character of any ribbon mic.
For an in-depth article on microphone preamplifiers, please consider reading My New Microphone's What Is A Microphone Preamplifier & Why Does A Mic Need One?
The Active Ribbon Microphone
Active ribbon microphones are largely designed to relieve us of the issues of low-level and inconsistent impedance.
The internal impedance converters/amplifiers, whether transistor-based or tube-based, act to “level out” the impedance of the ribbon microphone signal while also boosting the signal strength to level more easily handled by regular microphone preamps.
For more info on active and passive mics, check out my article Do Microphones Need Power To Function Properly?
General Characteristics Of A Ribbon Microphone
It's sometimes difficult to generalize an entire group of microphones. This is especially true of ribbon microphones since there are so many different designs. Nevertheless, in this section, we'll go through some of the general characteristics of ribbon microphones to improve our knowledge.
General characteristics of ribbon microphones include:
- Fragility
- Figure-8 (bidirectional) polar pattern
- Strong proximity effect
- Gentle roll-off of high frequencies
- Accurate transient response
Here are a few extra characteristics specifically for passive ribbon mics worth reiterating:
- Low Output Levels.
- Inconsistent frequency-dependent output impedance.
Let's discuss the characteristics common among all ribbon microphones in greater detail.
Fragility
Ribbon diaphragms are notoriously fragile. They are typically thinner than a strand of hair and tensioned at the two ends of their length.
Bursts of air and even vocal plosives can stretch or snap a ribbon diaphragm if strong enough.
Sharp airborne dust particles have been known to rip ribbon diaphragms as well.
Even storing a ribbon microphone incorrectly can lead to the sagging of the ribbon, which, in turn, makes it less effective and more prone to damage.
As previously discussed, phantom power and other voltages have the potential to damage a ribbon diaphragm. This typically happens during a hot patch or electrical surge, which would send an unbalanced DC voltage past the transformer and to the ribbon diaphragm.
We'll discuss how to properly care for ribbon microphones in the next section, safety tips for ribbon microphones.
Figure-8 (Bidirectional) Polar Pattern
Ribbon microphones, by the nature of their design, are the truest forms of pressure-gradient microphones. Both the front and rear of their diaphragms are exposed equally to sound pressure variations.
The ribbon diaphragm is held within a magnetic structure that typically allows both sides of the diaphragm to be equally exposed to sound pressure.
To explain, then, why these pressure-gradient ribbon mics have a bidirectional polar pattern, we'll have a look at some diagrams.
The following diagram represents a bidirectional pressure-gradient ribbon microphone with a sound source from the front:

In this scenario, the sound waves hit the front of the ribbon diaphragm, and then after a time t, they hit the rear of the diaphragm. This means that a single sound wave causes both phase and amplitude differences between the two sides of the diaphragm. The difference in sound pressure between the two sides causes the diaphragm to move and a mic signal to be outputted.
When the diaphragm is pushed inward (toward the rear), the signal has a positive polarity.
Next, we have a diagram that represents a bidirectional pressure-gradient ribbon microphone with a sound source from the rear:

A similar occurrence happens here. The sound waves from the rear hit the rear of the diaphragm first, and then after a time t, they hit the front. This, again, causes phase and amplitude differences between the front and rear of the diaphragm. These differences in sound pressure cause the diaphragm to move and a mic signal to be produced.
When the diaphragm is pushed outward (toward the front), the signal has a negative polarity.
Finally, here is a diagram representing a bidirectional pressure-gradient ribbon microphone with a sound source from the side:

When sound waves hit the bidirectional pressure-gradient ribbon microphone from the side, they reach the front and rear of the diaphragm simultaneously. This puts equal pressure on both sides of the diaphragm and causes no movement. No movement means no mic signal, so the microphone has essentially no sensitivity to sound from the sides.
This results in a bidirectional (figure-8) polar pattern. Since ribbon microphones are inherently designed this way, they inherently have bidirectional polar patterns.
Here is a bidirectional polar pattern graph with the above-drawn ribbon element overlaid:
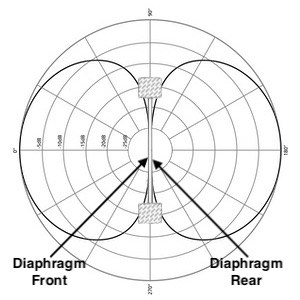
Note that the front of the bidirectional pattern yields and positive polarity signal while the rear of the bidirectional pattern yields a negative polarity signal.
I have written a very detailed article on the bidirectional polar pattern called What Is A Bidirectional/Figure-8 Microphone? (With Mic Examples).
Strong Proximity Effect
Pressure gradient microphones naturally exhibit the proximity effect, which causes the bass response of a microphone to increase as the sound source gets closer.
To learn everything you need to know about the proximity effect, check out my article The In-Depth Guide To Microphone Proximity Effect.
Gentle Roll-Off Of High Frequencies
Ribbon microphones naturally become less sensitive to higher-end frequencies.
The high-end roll-off in ribbon microphones is mainly due to 4 factors:
- Irregular shape of the ribbon diaphragm.
- The low weight of the ribbon.
- Phase relationship between the front and back of the ribbon diaphragm.
- Proximity effect.
This gentle roll-off of high frequencies actually pushed ribbon microphones out of favour at one point in time. When condenser microphones became practical in the days of analog recording, they were much preferred over ribbon mics. This is because analog recording had an inherent high-end roll-off as well, and the brightness of condenser microphones helped to mitigate an overly dark recording.
Today, however, we're in the age of digital audio recording, which is “perfect” and “bright.” Nowadays, ribbon mics are back in style due to their natural darkness, which now helps to mitigate the overly bright digital audio recording.
Accurate Transient Response
The thinness and low tension of the ribbon diaphragm make it very reactive to incoming sound waves. The transients (peaks in sound pressure variation) are well-represented by the typical ribbon diaphragm movement.
For everything you need to know about microphone transient response, check out My New Microphone's article What Is Microphone Transient Response & Why Is It Important?
Safety Tips For Ribbon Microphones
As previously suggested, ribbon microphones are fragile. I've compiled a list of do's and don'ts to help you protect your ribbon mics and save yourself from having to re-ribbon your tools.
The Do's Of Ribbon Microphone Safety
- Do use a pop filter when recording vocals.
- Do use a windscreen if working with a ribbon microphone in windy environments.
- Do position the microphone off-axis when recording loud SPL sources.
- Do use quality mic cables with proper wiring.
- Do use a “mic sock” when transporting a ribbon mic.
- Do store the ribbon microphone properly and upright when it’s not in use.
The Don'ts Of Ribbon Microphone Safety
- Don’t expose the microphone to wind or blasts of air.
- Don’t hot patch the ribbon mics with phantom power engaged.
- Don’t subject the ribbon microphone to foreign particles.
- Don’t “mic drop” a ribbon microphone.
By following the above guides, you'll stand a better chance at keeping your ribbon microphone safe and sound. Remember that ribbon diaphragms are relatively easy to stretch, snap, or damage in general. Taking some simple precautions will help tremendously in the longevity of your mic (and in your budget).
Applications Of Ribbon Microphones
Though ribbon microphones are used on a plethora of sources in the studio environment (and sometimes even in live stage performances), there are a few applications in which ribbon microphones truly excel. Let's have a look at some popular and effective ribbon microphone applications:
Vocals
Ribbon microphones, in general, sound very natural. This natural pick-up sounds great on vocals.
Unfortunately, their bidirectional pattern and fragility keep them away from live stage performances. Bidirectional patterns are terrible for gain-before-feedback when stage monitors are present. The fragility of most ribbon mics makes it dangerous to bring them on stage when they may be subjected to damage.
However, in the studio, ribbons excel on both signing vocals and voiceover vocals. Of course, we must still be careful not to damage the ribbon when singing/speaking and sending plosives toward the mic.
It’s always best practice to tilt ribbon mics slightly off-axis and place a pop filter between the vocalist and the mic.
Brass
Ribbon mics really capture brass instruments with clarity and character. The ribbon microphones' accuracy and natural, slightly dark character accentuate brass instruments remarkably well, bringing them to life in recordings.
Guitar Amplifiers
Ribbon mics get a lot of love from guitarists. Guitar amplifiers sound great through ribbon microphones. The typical ribbon mic captures the true sound of an amplifier with ease while also capturing the airiness of the room without being overly bright.
Drum Overheads
Though condensers are the most common choice for drum overheads, ribbon mics also excel in this position. The neutral sound of a pair of ribbon mics can really capture the entire character of a full drum kit in stereo.
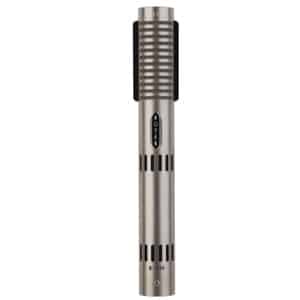
Ribbon Microphone Examples
To really learn about ribbon microphones, it's important we go over some examples of ribbon mics. In this section, we'll discuss each mic according to its characteristics and general applications and relate these aspects to the previous sections of this article.
The ribbon microphones we'll be going over are:
Royer R-121
The Royer R-121 is one of, if not the most, popular ribbon microphones in existence and is the flagship microphone of the industry-leading ribbon mic manufacturer Royer Labs.
This bidirectional ribbon mic sounds incredible on guitar amps and brass instruments.

Though somewhat fragile, the R-121 has made appearances on the live stage in front of guitar stacks. So long as we keep the microphone out of harm's way, it will continue to perform night after night.
The R-121 has all the generalities of a ribbon mic, including an accurate transient response, strong proximity effect, and a natural-sounding high-end roll-off.
In terms of sound quality, though, the Royer R-121 is in a league of its own and is an excellent choice for a first-time ribbon mic user and an experienced expert alike.
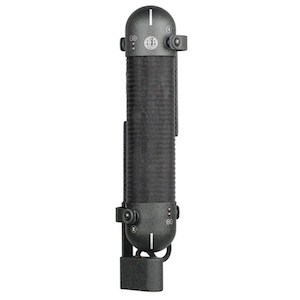
Coles 4038
The Coles 4038, nicknamed the “waffle iron,” is the oldest ribbon microphone model on this list. Though originally designed for the BBC in 1953, the 4038 made its first commercial debut in 1961.
This bidirectional ribbon microphone is a distinguished and cherished classic among musicians, recording engineers, and audiophiles alike.
Coles Electroacoustics
Coles Electroacoustics is featured in My New Microphone's Top 11 Best Microphone Brands You’ve Likely Never Heard Of.
This microphone was initially intended for vocals and voiceover and excels on both. Throughout the years, the 4038 has also made a name for itself as an excellent horn microphone. This jack-of-all-trades also sounds great on guitar amps and as a drum overhead as well.
As for the general characteristics of a passive ribbon mic, the 4038 portrays them all. Its ribbon diaphragm is relatively fragile; it exhibits the proximity effect; it has a natural-sounding high-end roll-off; it has a low output sensitivity, and its transient response is amazingly accurate.
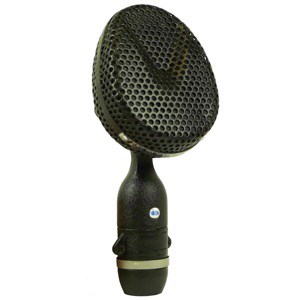
Beyerdynamic M 160
The Beyerdynamic M 160 is an oddity in the ribbon mic world. Its peculiar design yields a hypercardioid polar pattern rather than the standard bidirectional pattern. This microphone is also top-address (picks up sound from the top) rather than side-address like practically all ribbon mics.
In order to achieve the hypercardioid pattern, the M 160 utilizes a top-address-styled acoustic labyrinth. The mic also features two ribbon diaphragms 0.5 mm apart. Both diaphragms are creased vertically and horizontally, which makes them more rigid and less prone to distortion and fatigue.
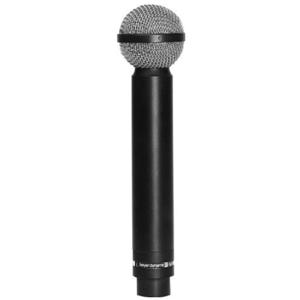
Though an exception to the rule, the M 160 still depicts most of the typical passive ribbon mic traits, such as an accurate transient response and a natural frequency response.
AEA R88
The AEA R88 is another example of a dual-diaphragm ribbon microphone. Only this time, the two ribbons are set up in Blumlein Pair configuration to produce a stereo signal.
The Blumlein Pair features two bidirectional microphones (or, in this case, ribbon baffles) positioned one on top of the other facing 90-degrees from one another. Let's have a look at the Blumlein Pair in a graph:

The AEA R88 has a 5-pin XLR output and comes with a breakout cable with a 5-pin connector at one end and two 3-pin connectors at the other.
The R88 MKII model is a passive microphone, though AEA also has an active model named the R88A.
This passive version features the typical characteristics of a passive ribbon mic, only in stereo.
AEA's R88 sounds great on guitar amps, vocals, drums, and horns. In stereo, it also excels as a room microphone and even in a single-mic setup.
AEA
AEA is featured in My New Microphone's Top 11 Best Microphone Brands You Should Know And Use.
Royer R-122
The Royer R-122 is the active version of Royer's incredibly successful R-121.
The R-122 MKII (pictured above) has all the upsides of sound quality from the original R-121 but with a much higher output level and better output impedance that matches all standard microphone preamplifiers.
This bidirectional ribbon mic also features a switchable -15 dB pad and a bass-cut switch that starts filtering at 100 Hz down 6 dB per octave.
The R-122 requires phantom power to function properly.
This microphone's applications are listed as:
- Electric guitar amps
- Acoustic guitar
- Drum overheads
- Percussion instruments
- Brass and woodwinds
- Horn sections
- Acoustic piano
- Harp
- Solo strings & string sections
- Choirs and orchestras
- Commercial broadcast
- Voiceover
Royer R-122V
The Royer R-122V is another big invention by Royer and marks the first-ever tube ribbon microphone.
Royer's R-122V takes the greatness of its ribbon microphone technology and combines it with top-of-the-line vacuum tube electronics to create an amazing tube ribbon microphone.
This microphone captures audio with unparalleled richness, depth, and detail. It requires its own custom power supply unit that connects via a 7-pin cable configuration.
The R-122V's applications are listed as:
- Orchestral miking, close and distant
- Strings – solo & sections
- Acoustic piano
- Harp
- Electric guitar
- Acoustic guitar
- Vocals, commercial broadcast, voiceover
- Brass, horn sections
- Drum overheads, room miking
- Percussion instruments
Differences Between Ribbon And Dynamic Microphones
As previously mentioned, moving-coil dynamic microphones and ribbon dynamic microphones both transduce energy and turn sound into audio via the principle of electromagnetic induction.
This is a huge commonality, but these mic types have enough distinctions to make them each their own defined type. The primary difference is obviously the design of the transducer element. Moving-coil mics have a moving conductive coil attached to a non-conductive diaphragm. Ribbon mics have conductive ribbon-like diaphragms.
There are other noteworthy differences between dynamic and ribbon mics. Let's have a look at them in the table below:
| Moving-Coil Dynamic Microphones | Ribbon Dynamic Microphones | |
|---|---|---|
| Conductive Element | Coil attached to diaphragm | Diaphragm itself |
| Sensitivity Ratings | Low | Lower |
| Transient Response | Slow | Natural |
| Frequency Response | Coloured | Natural high-end roll-off |
| Active Or Passive | Passive | Active or passive |
| Transformer Or Transformerless | Either | Passive: always Active: nearly always |
| Polar Patterns | Omnidirectional & unidirectional, but not bidirectional | Bidirectional by default, though other patterns are achievable |
| Durability | Very durable | Fragile |
| Price | Inexpensive to moderate | Moderate to expensive |
For more information on the differences between ribbon and dynamic mics, check My New Microphone's article Differences Between Moving-Coil & Ribbon Dynamic Microphones.
Differences Between Ribbon And Condenser Microphones
Ribbon and condenser microphones are very different from one another and are both cherished for their character in and out of recording studio environments.
The main differences in these mic types are the transducer principle (ribbon mics use electromagnetic induction while condensers use electrostatic principles) and the element design (ribbons use conductive ribbon-like diaphragms in a magnetic structure while condensers utilize a parallel-plate capacitor-like system).
The full list of general differences between ribbon and condenser microphones is shown in the table below:
| Ribbon Microphones | Condenser Microphones | |
|---|---|---|
| Transducer Principle | Electromagnetic induction | Electrostatic principles |
| Active/Passive | Passive or active | Active |
| Frequency Response | Natural | Flat/extended |
| Transient Response | Accurate | Fast |
| Polar Patterns | Naturally bidirectional | All (especially with dual-diaphragm capsule) |
| Sensitivity | Very low (high if active) | High |
| Self-Noise | No (yes if active) | Yes |
| Maximum Sound Pressure Level | Often too high to measure | Often within practical limits |
| Transformer coupled output | Passive: always Active: sometimes | Sometimes |
| Durability | Fragile | Somewhat durable |
| Price | Moderate | Cheap to very expensive |
For an in-depth read into the differences between ribbon and condenser mics, check out My New Microphone's article The Differences Between Condenser And Ribbon Microphones.
Related Questions
Who invented the microphone? Though there is some argument over who invented the first-ever microphone, most historians would say Emile Berliner invented the first microphone in 1876. The design patent for the microphone was sold to Bell Telephone Company for $50,000.
How many types of microphones are there? The three main types of microphones are dynamic, condenser and ribbon. Dynamic and ribbon mics are electromagnetic transducers, while condensers are electrostatic transducers. Mic types can be further distinguished by polar pattern, diaphragm size and design, application, power requirements, and many other factors.
Choosing the right microphone(s) for your applications and budget can be a challenging task. For this reason, I've created My New Microphone's Comprehensive Microphone Buyer's Guide. Check it out for help in determining your next microphone purchase.
Leave A Comment!
Have any thoughts, questions or concerns? I invite you to add them to the comment section at the bottom of the page! I'd love to hear your insights and inquiries and will do my best to add to the conversation. Thanks!
This article has been approved in accordance with the My New Microphone Editorial Policy.